Revision [607]
This is an old revision of InstallationFullHDD made by coolpup on 2009-08-25 00:55:08.
It is assumed that your PC is able to boot from an optical disc drive, and that you are installing to an internal hard disk drive.
<br />
<br />
Please note that the partition sizes used are for example only; make yours to the sizes that you want. As to the size of the SWAP partition, it is usually recommended that it is twice the size of your RAM. So if you have 128MB of RAM, create a SWAP partititon of 256MB,
<br />
<br />
Before starting, make a note of what screen resolution your graphics card/monitor can handle; you will need this information soon after booting the CD.
<br />
<br />
<span style="font-weight: bold">Also note</span> that because this was done using QEMU, i had to use Xvesa therefore i cannot show any screenshots for the Xorg sequences.
<br />
<br />
QEMU is a generic and open source machine emulator and virtualizer. For more information, visit the <a class="postlink" target="_blank" href="http://bellard.org/qemu/about.html"><span style="color: blue">QEMU website.</span></a><br />
So for the purpose of this how-to, just ignore the QEMU window, you will not see it yourself, so do not expect to.
<br />
<br />
<span style="font-weight: bold">Part 1</span>. <span style="font-style: italic"><span style="font-size: 18px; line-height: normal">Booting to the desktop</span>.</span>
<br />
<br />
Place the Puppy LiveCD/DVD into the drive and re-boot the computer.
<br />
<br />
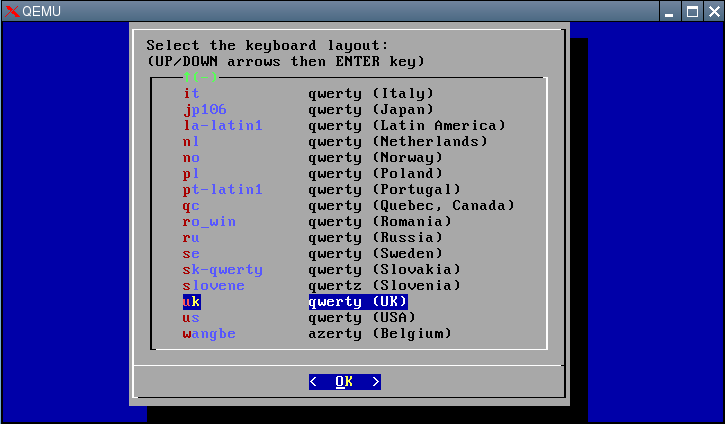
The first thing you see will be this:
<br />
<span style="font-weight: bold">Image-1</span>
<br />
<a class="postlink" target="_blank" Unknown action; the action name must not contain special characters.><img border="0" Unknown action; the action name must not contain special characters./></a>
<br />
<br />
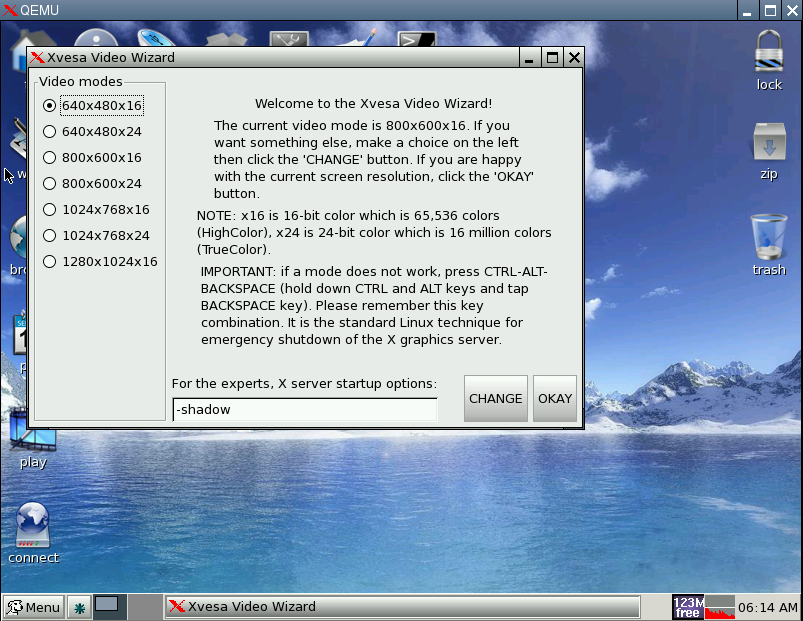
Next you will be asked to select the keyboard layout:
<br />
<span style="font-weight: bold">Image-2</span>
<br />
<a class="postlink" target="_blank" href="http://www.servimg.com/image_preview.php?i=32&u=12365505"><img border="0" src="http://i46.servimg.com/u/f46/12/36/55/05/210.png" /></a>
<br />
Use the up/down arrows on the keyboard to make your choice then press ENTER/RETURN for OK.
<br />
<br />
Next you will be asked to choose either Xorg or Xvesa, make your choice (try Xorg first, if that fails then use Xvesa):
<br />
<span style="font-weight: bold">Image-3</span>
<br />
<a class="postlink" target="_blank" href="http://www.servimg.com/image_preview.php?i=33&u=12365505"><img border="0" src="http://i46.servimg.com/u/f46/12/36/55/05/310.png" /></a>
<br />
If you need to use Xvesa use the TAB key to make your selection then press ENTER/RETURN for OK.
<br />
<br />
If you chose Xorg, you then need to select a screen resolution:
<br />
Select an appropriate resolution then press ENTER/RETURN for OK.
<br />
<br />
Now test it:
<br />
Again, use the TAB key to select Test, then press ENTER/RETURN for OK
<br />
<br />
If it works, thats good, if it did not, then try with Xvesa
<br />
now do the linux three finger shuffle (Ctrl + Alt + Backspace)
<br />
<br />
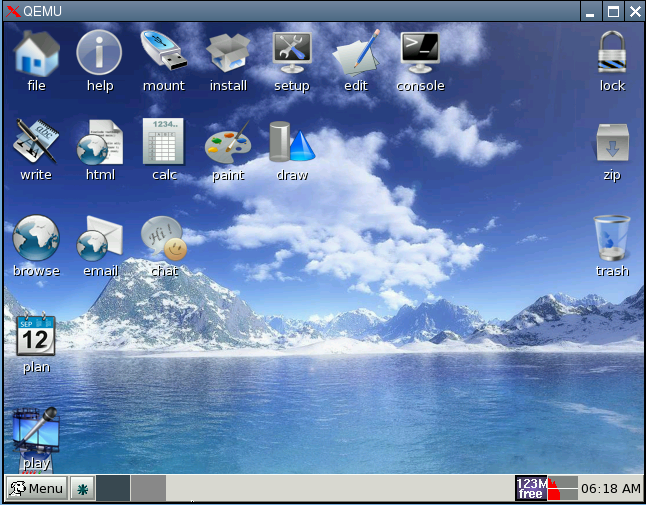
If you chose Xvesa you will then see this:
<br />
<span style="font-weight: bold">Image-4</span>
<br />
<a class="postlink" target="_blank" href="http://www.servimg.com/image_preview.php?i=34&u=12365505"><img border="0" src="http://i46.servimg.com/u/f46/12/36/55/05/610.png" /></a>
<br />
Select an appropriate resolution and click Change
<br />
<br />
When the desktop comes back up, along with the Xvesa video wizard click OKAY
<br />
<br />
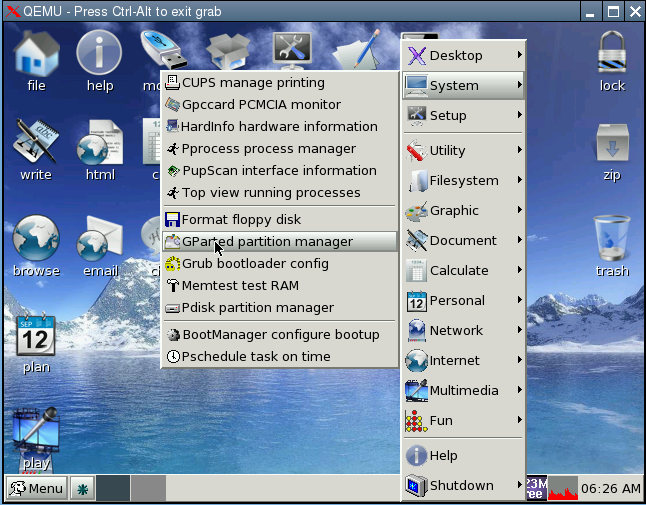
You should now be at the desktop like this:
<br />
<span style="font-weight: bold">Image-5</span>
<br />
<a class="postlink" target="_blank" href="http://www.servimg.com/image_preview.php?i=35&u=12365505"><img border="0" src="http://i46.servimg.com/u/f46/12/36/55/05/710.png" /></a>
<br />
<br />
<br />
<span style="font-weight: bold">Part 2</span>. <span style="font-style: italic"><span style="font-size: 18px; line-height: normal">Partitioning and Formatting the drive</span>.</span>
<br />
<br />
Now for the main part of this how-to.
<br />
<br />
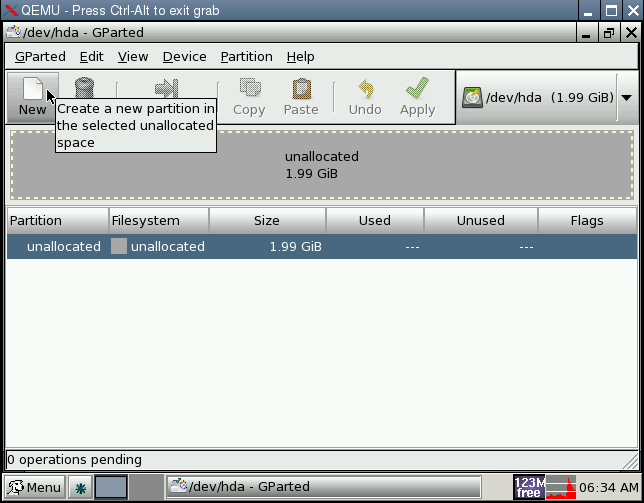
Right click the desktop to get the menu up,
<br />
now go to System > GParted partition manager
<br />
<span style="font-weight: bold">Image-6</span>
<br />
<a class="postlink" target="_blank" href="http://www.servimg.com/image_preview.php?i=36&u=12365505"><img border="0" src="http://i46.servimg.com/u/f46/12/36/55/05/810.png" /></a>
<br />
<br />
Next click to highlight where it says unallocated (where it is blue in the picture below)
<br />
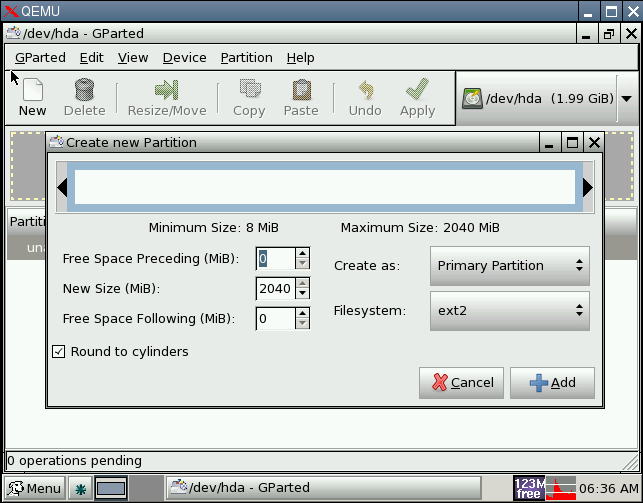
Then click on New to create a new partition.
<br />
<span style="font-weight: bold">Image-7</span>
<br />
<a class="postlink" target="_blank" href="http://www.servimg.com/image_preview.php?i=37&u=12365505"><img border="0" src="http://i46.servimg.com/u/f46/12/36/55/05/910.png" /></a>
<br />
<br />
You will get something similar to this:
<br />
<span style="font-weight: bold">Image-8</span>
<br />
<a class="postlink" target="_blank" href="http://www.servimg.com/image_preview.php?i=38&u=12365505"><img border="0" src="http://i46.servimg.com/u/f46/12/36/55/05/1010.png" /></a>
<br />
<br />
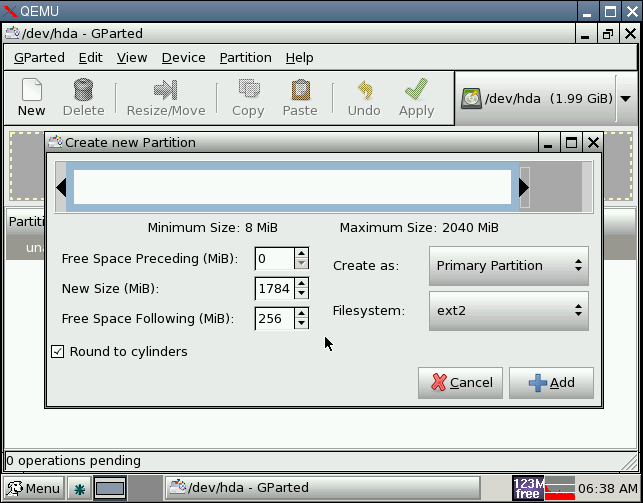
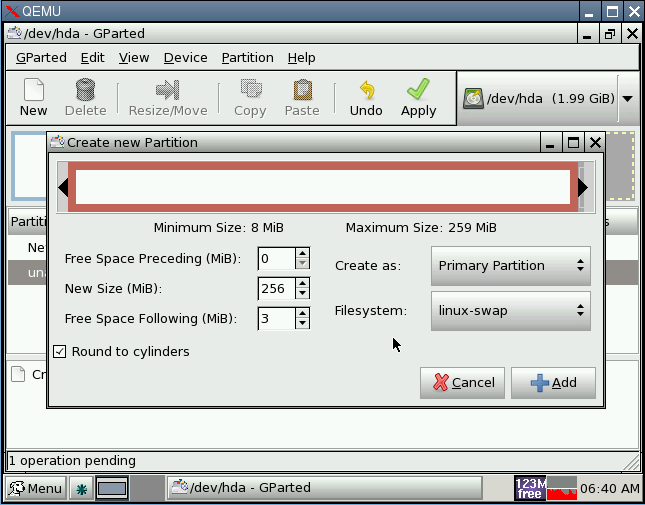
Make the partition to the size you wish, as you can see below, i left enough space for the SWAP partition.
<br />
For Filesystem you can choose either ext2 or ext3.
<br />
<br />
If you are wondering what the difference is between the Filesystems,
<br />
and would like to know more, please check out the following links:
<br />
<br />
<span style="font-weight: bold"><a class="postlink" target="_blank" href="http://en.wikipedia.org/wiki/Ext2">http://en.wikipedia.org/wiki/Ext2</a></span>
<br />
<span style="font-weight: bold"><a class="postlink" target="_blank" href="http://en.wikipedia.org/wiki/Ext3">http://en.wikipedia.org/wiki/Ext3</a></span>
<br />
<br />
<span style="font-weight: bold">Image-9</span>
<br />
<a class="postlink" target="_blank" href="http://www.servimg.com/image_preview.php?i=39&u=12365505"><img border="0" src="http://i46.servimg.com/u/f46/12/36/55/05/1110.png" /></a>
<br />
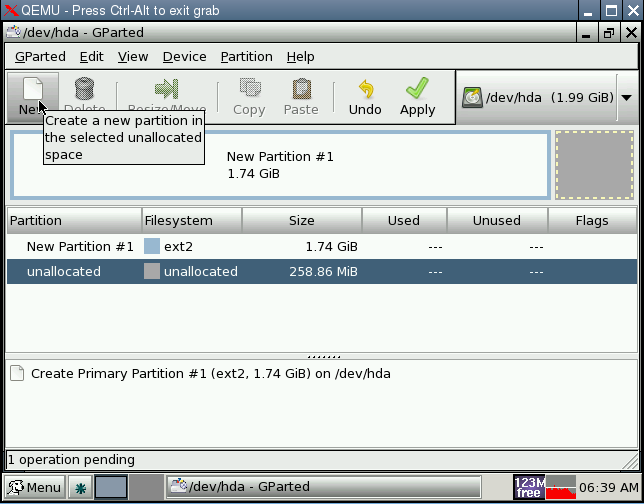
Click on Add
<br />
<br />
Once again click to highlight unallocated, then New
<br />
<span style="font-weight: bold">Image-10</span>
<br />
<a class="postlink" target="_blank" href="http://www.servimg.com/image_preview.php?i=40&u=12365505"><img border="0" src="http://i46.servimg.com/u/f46/12/36/55/05/1210.png" /></a>
<br />
<br />
Now create the SWAP partition (be sure to select linux-swap as Filesystem)
<br />
<span style="font-weight: bold">Image-11</span>
<br />
<a class="postlink" target="_blank" href="http://www.servimg.com/image_preview.php?i=41&u=12365505"><img border="0" src="http://i46.servimg.com/u/f46/12/36/55/05/1310.png" /></a>
<br />
click on Add
<br />
<br />
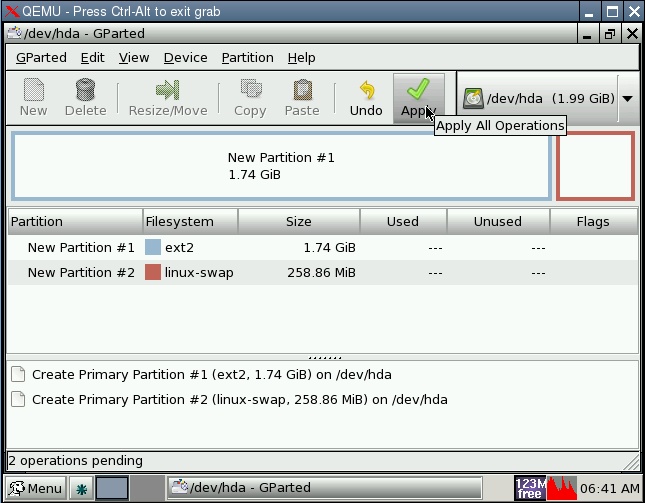
Next click on Apply
<br />
<span style="font-weight: bold">Image-12</span>
<br />
<a class="postlink" target="_blank" href="http://www.servimg.com/image_preview.php?i=42&u=12365505"><img border="0" src="http://i46.servimg.com/u/f46/12/36/55/05/1410.png" /></a>
<br />
<br />
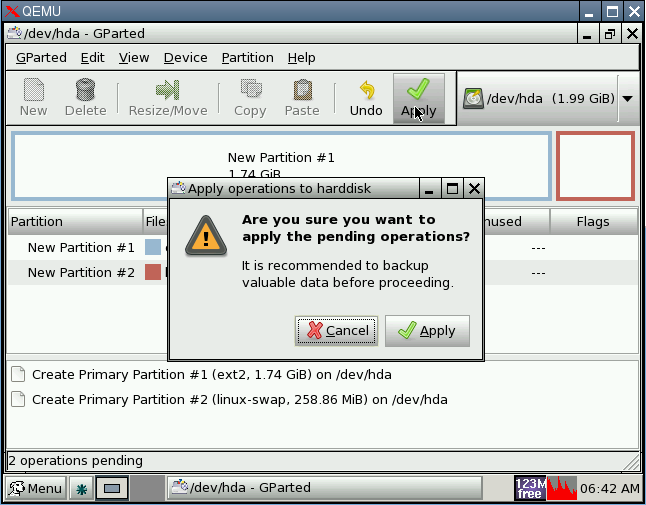
And again, click on Apply
<br />
<span style="font-weight: bold">Image-13</span>
<br />
<a class="postlink" target="_blank" href="http://www.servimg.com/image_preview.php?i=43&u=12365505"><img border="0" src="http://i46.servimg.com/u/f46/12/36/55/05/1510.png" /></a>
<br />
<br />
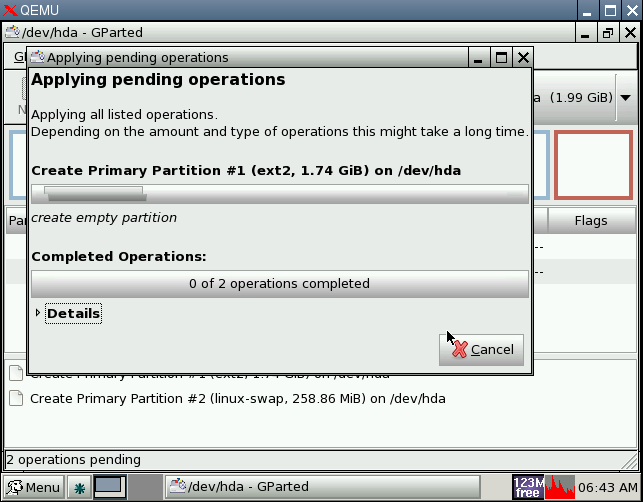
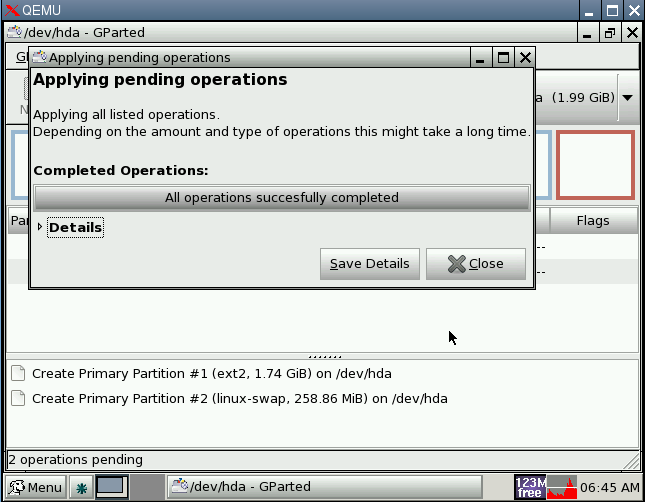
You will now see it Applying pending operations
<br />
<span style="font-weight: bold">Image-14</span>
<br />
<a class="postlink" target="_blank" href="http://www.servimg.com/image_preview.php?i=44&u=12365505"><img border="0" src="http://i46.servimg.com/u/f46/12/36/55/05/1610.png" /></a>
<br />
<br />
When it has finished, click on Close
<br />
<span style="font-weight: bold">Image-15</span>
<br />
<a class="postlink" target="_blank" href="http://www.servimg.com/image_preview.php?i=45&u=12365505"><img border="0" src="http://i46.servimg.com/u/f46/12/36/55/05/1710.png" /></a>
<br />
<br />
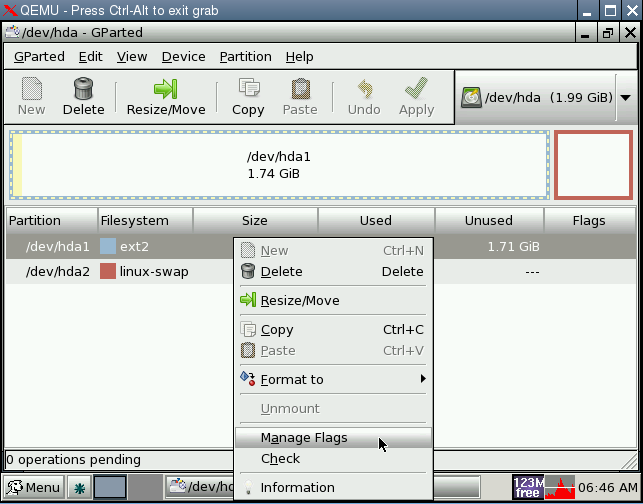
Now click to highlight /dev/hda1
<br />
then RIGHT click and select Manage Flags.
<br />
<span style="font-weight: bold">Image-16</span>
<br />
<a class="postlink" target="_blank" href="http://www.servimg.com/image_preview.php?i=46&u=12365505"><img border="0" src="http://i46.servimg.com/u/f46/12/36/55/05/1810.png" /></a>
<br />
<br />
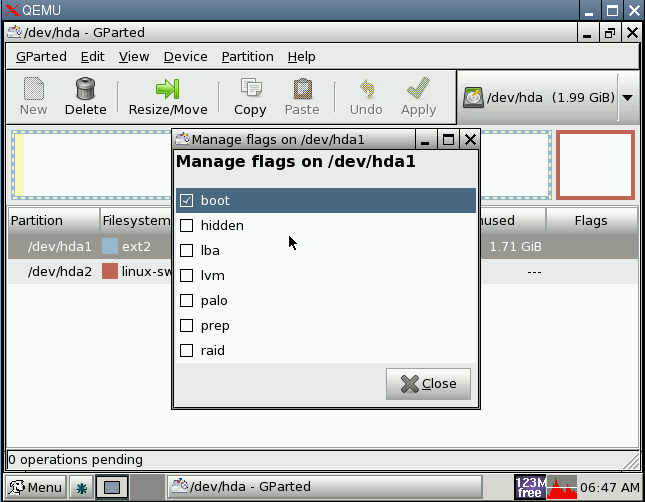
Now click to select boot.
<br />
<span style="font-weight: bold">Image-17</span>
<br />
<a class="postlink" target="_blank" href="http://www.servimg.com/image_preview.php?i=47&u=12365505"><img border="0" src="http://i46.servimg.com/u/f46/12/36/55/05/1910.png" /></a>
<br />
when its ready click on Close.
<br />
<br />
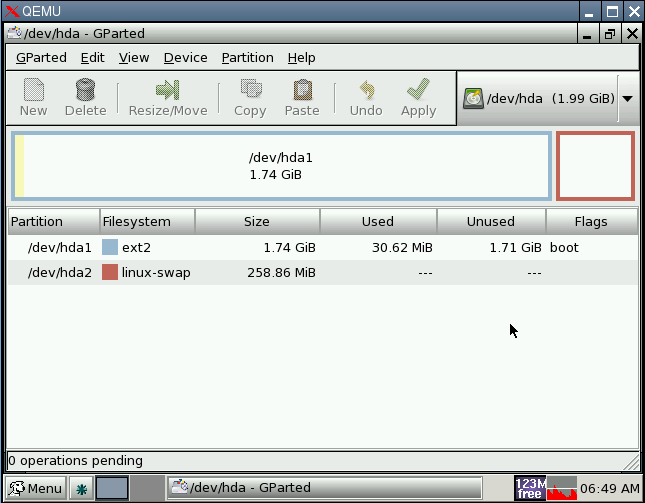
Things should now look something like this.
<br />
<span style="font-weight: bold">Image-18</span>
<br />
<a class="postlink" target="_blank" href="http://www.servimg.com/image_preview.php?i=48&u=12365505"><img border="0" src="http://i46.servimg.com/u/f46/12/36/55/05/2010.png" /></a>
<br />
If so, you can now close GParted, we are finished with it.
<br />
<br />
<br />
<span style="font-weight: bold">Part 3</span>. <span style="font-style: italic"><span style="font-size: 18px; line-height: normal">Install Time</span>.</span>
<br />
<br />
Now we will use the Puppy Universal Installer to make a full installation to hda1, followed by installing GRUB to the MBR.
<br />
<br />
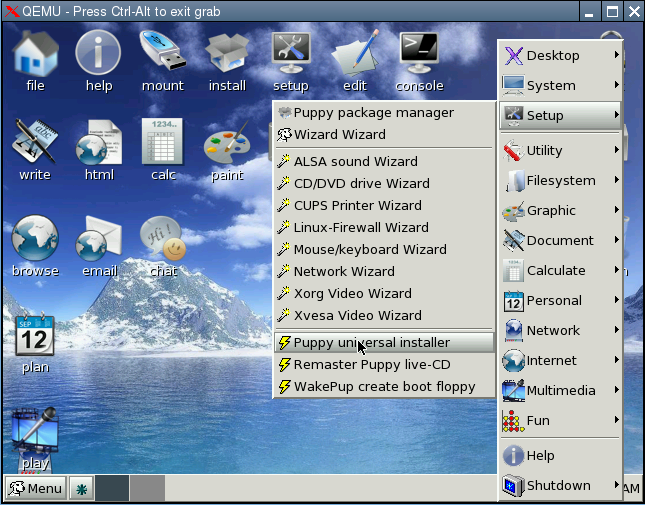
So again RIGHT click the desktop and go to Setup > Puppy universal installer
<br />
<span style="font-weight: bold">Image-19</span>
<br />
<a class="postlink" target="_blank" href="http://www.servimg.com/image_preview.php?i=49&u=12365505"><img border="0" src="http://i46.servimg.com/u/f46/12/36/55/05/2110.png" /></a>
<br />
<br />
Select Internal (IDE or SATA) hard drive
<br />
<span style="font-weight: bold">Image-20</span>
<br />
<a class="postlink" target="_blank" href="http://www.servimg.com/image_preview.php?i=50&u=12365505"><img border="0" src="http://i46.servimg.com/u/f46/12/36/55/05/2210.png" /></a>
<br />
Then click OK
<br />
<br />
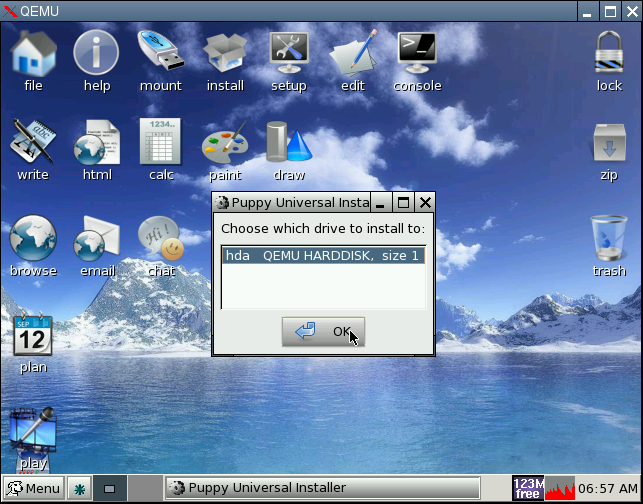
Next choose which drive to install to (in this case it is hda)
<br />
<span style="font-weight: bold">Image-21</span>
<br />
<a class="postlink" target="_blank" href="http://www.servimg.com/image_preview.php?i=51&u=12365505"><img border="0" src="http://i46.servimg.com/u/f46/12/36/55/05/2310.png" /></a>
<br />
Then click OK
<br />
<br />
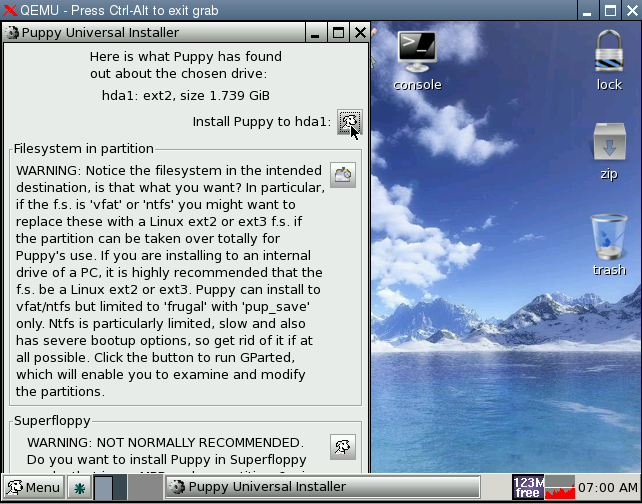
Next select the partition to install to (in this case it is hda1)
<br />
<span style="font-weight: bold">Image-22</span>
<br />
<a class="postlink" target="_blank" href="http://www.servimg.com/image_preview.php?i=52&u=12365505"><img border="0" src="http://i46.servimg.com/u/f46/12/36/55/05/2410.png" /></a>
<br />
<br />
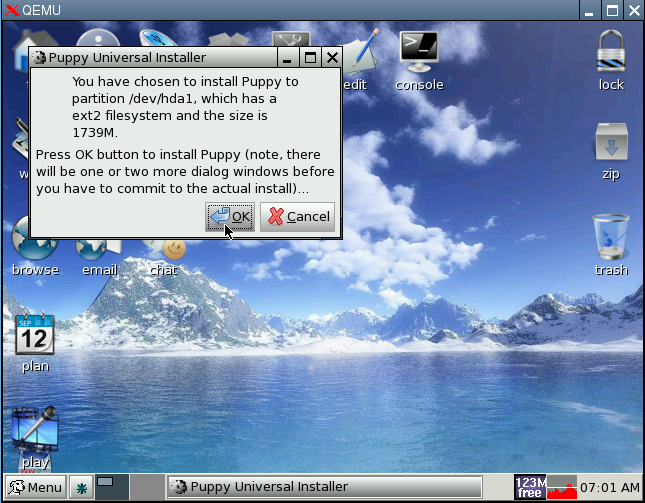
Confirm your choice, by clicking on OK
<br />
<span style="font-weight: bold">Image-23</span>
<br />
<a class="postlink" target="_blank" href="http://www.servimg.com/image_preview.php?i=53&u=12365505"><img border="0" src="http://i46.servimg.com/u/f46/12/36/55/05/2510.png" /></a>
<br />
<br />
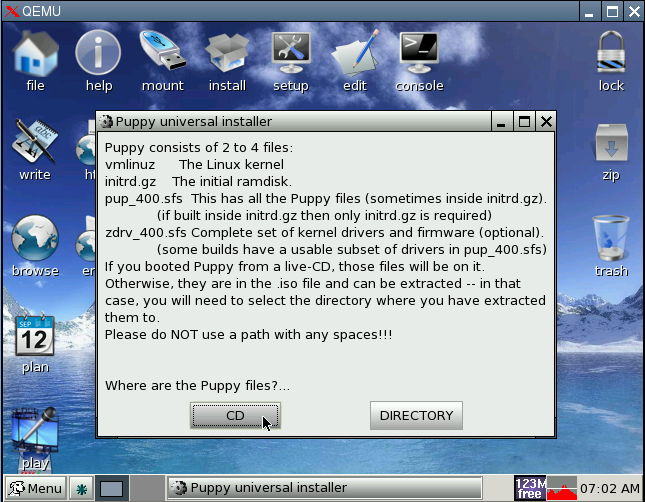
Now tell it where the files are, in this case click on CD
<br />
<span style="font-weight: bold">Image-24</span>
<br />
<a class="postlink" target="_blank" href="http://www.servimg.com/image_preview.php?i=54&u=12365505"><img border="0" src="http://i46.servimg.com/u/f46/12/36/55/05/2610.png" /></a>
<br />
<br />
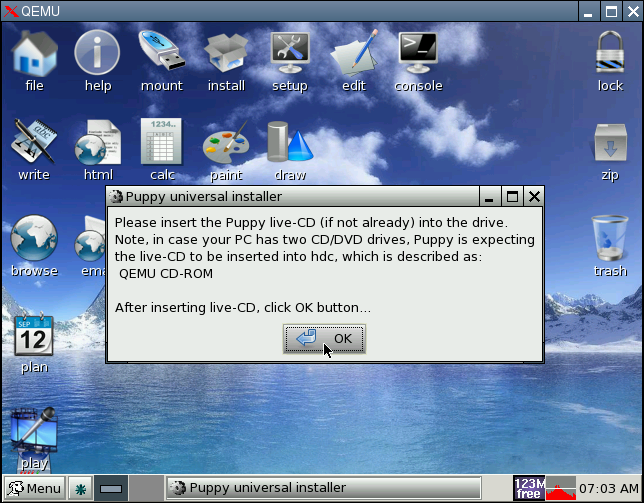
Click OK again
<br />
<span style="font-weight: bold">Image-25</span>
<br />
</p>
<p>
<a class="postlink" target="_blank" href="http://www.servimg.com/image_preview.php?i=55&u=12365505"><img border="0" src="http://i46.servimg.com/u/f46/12/36/55/05/2710.png" /></a><br />
<br />
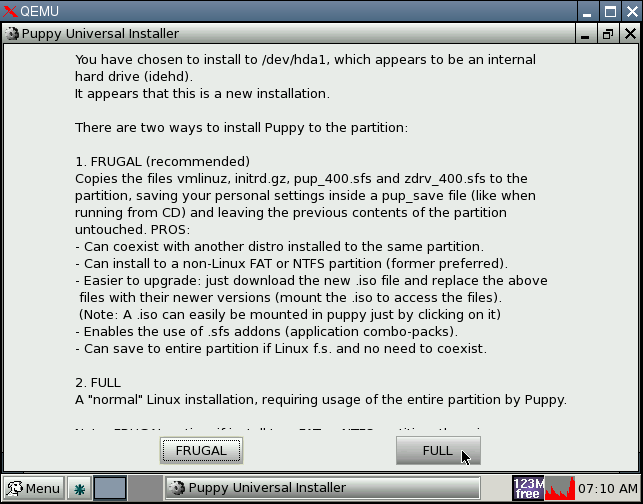
Next we will choose FULL
<br />
<span style="font-weight: bold">Image-26</span>
<br />
<a class="postlink" target="_blank" href="http://www.servimg.com/image_preview.php?i=56&u=12365505"><img border="0" src="http://i46.servimg.com/u/f46/12/36/55/05/2810.png" /></a>
<br />
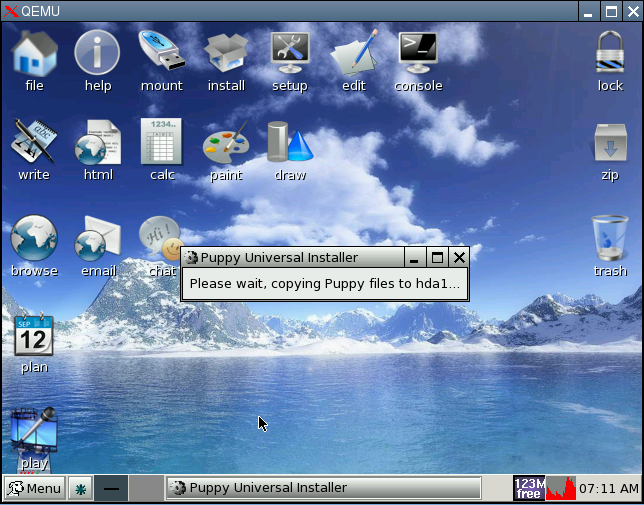
<br />
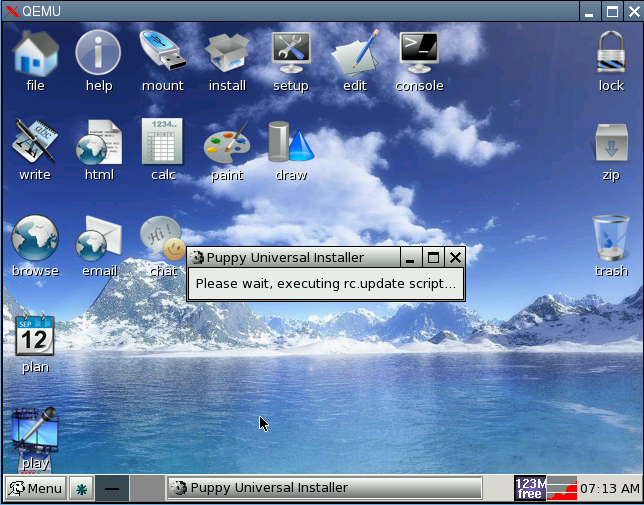
Now wait, while it copies files to the hard drive
<br />
<span style="font-weight: bold">Image-27</span>
<br />
<a class="postlink" target="_blank" href="http://www.servimg.com/image_preview.php?i=57&u=12365505"><img border="0" src="http://i46.servimg.com/u/f46/12/36/55/05/2910.png" /></a>
<br />
<span style="font-weight: bold">Image-28</span>
<br />
<a class="postlink" target="_blank" href="http://www.servimg.com/image_preview.php?i=58&u=12365505"><img border="0" src="http://i46.servimg.com/u/f46/12/36/55/05/3010.png" /></a>
<br />
<br />
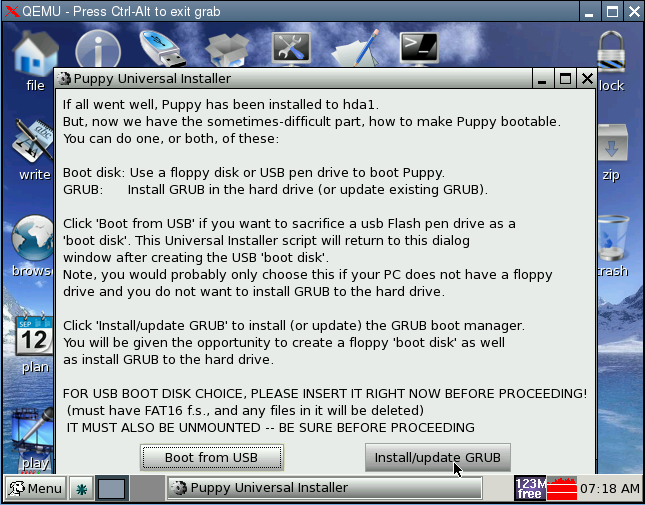
Now we will install GRUB
<br />
<span style="font-weight: bold">Image-29</span>
<br />
<a class="postlink" target="_blank" href="http://www.servimg.com/image_preview.php?i=59&u=12365505"><img border="0" src="http://i46.servimg.com/u/f46/12/36/55/05/3110.png" /></a>
<br />
<br />
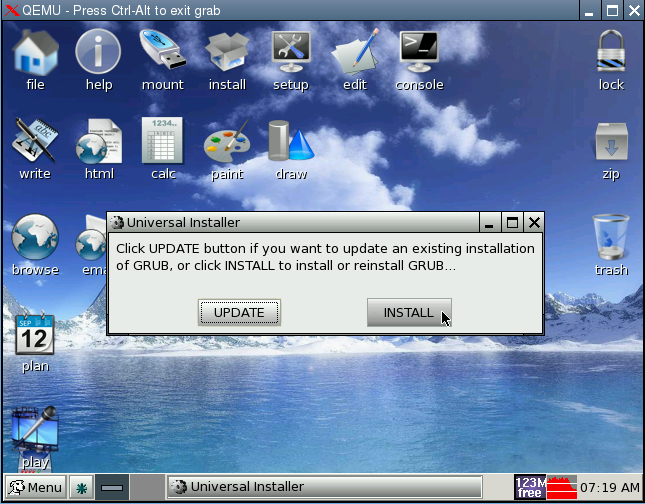
Select INSTALL
<br />
<span style="font-weight: bold">Image-30</span>
<br />
<a class="postlink" target="_blank" href="http://www.servimg.com/image_preview.php?i=60&u=12365505"><img border="0" src="http://i46.servimg.com/u/f46/12/36/55/05/3210.png" /></a>
<br />
<br />
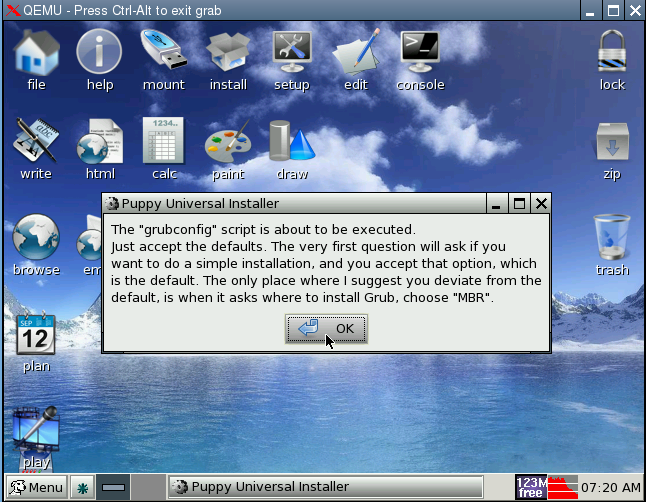
Click OK
<br />
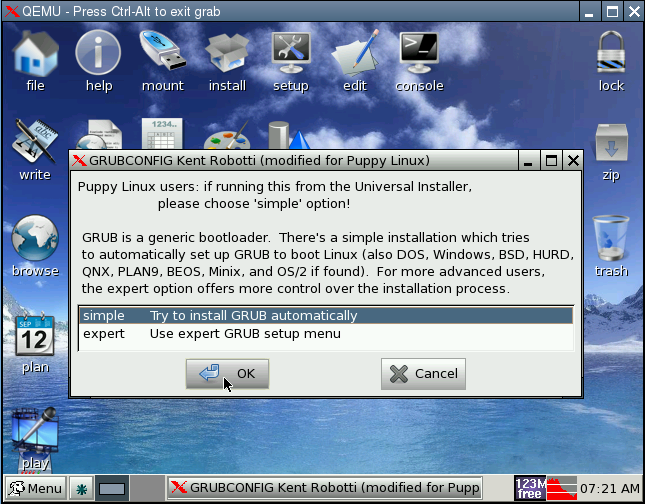
<span style="font-weight: bold">Image-31</span>
<br />
<a class="postlink" target="_blank" href="http://www.servimg.com/image_preview.php?i=61&u=12365505"><img border="0" src="http://i46.servimg.com/u/f46/12/36/55/05/3310.png" /></a>
<br />
<br />
Choose simple and click OK
<br />
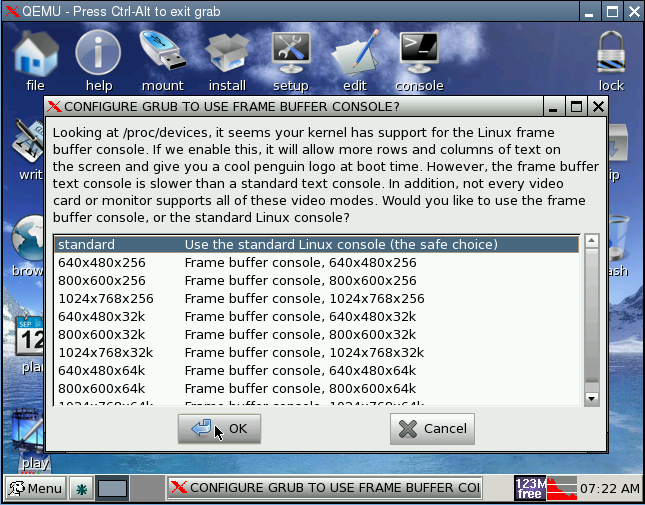
<span style="font-weight: bold">Image-32</span>
<br />
<a class="postlink" target="_blank" href="http://www.servimg.com/image_preview.php?i=62&u=12365505"><img border="0" src="http://i46.servimg.com/u/f46/12/36/55/05/3410.png" /></a>
<br />
<br />
Select standard and click OK
<br />
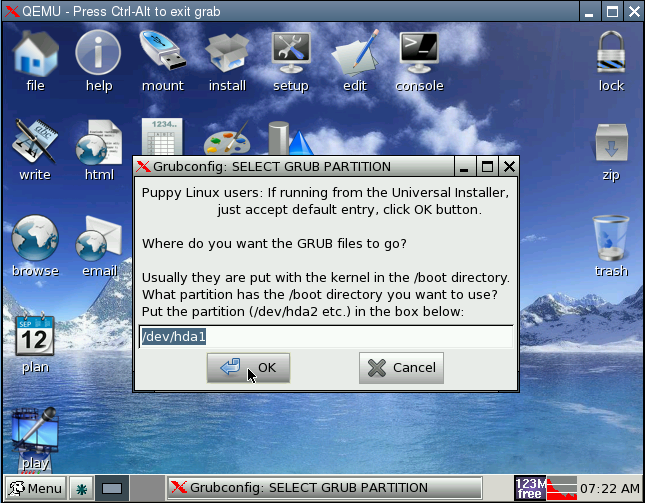
<span style="font-weight: bold">Image-33</span>
<br />
<a class="postlink" target="_blank" href="http://www.servimg.com/image_preview.php?i=63&u=12365505"><img border="0" src="http://i46.servimg.com/u/f46/12/36/55/05/3510.png" /></a>
<br />
<br />
Accept the default entry (in this case /dev/hda1) and click OK
<br />
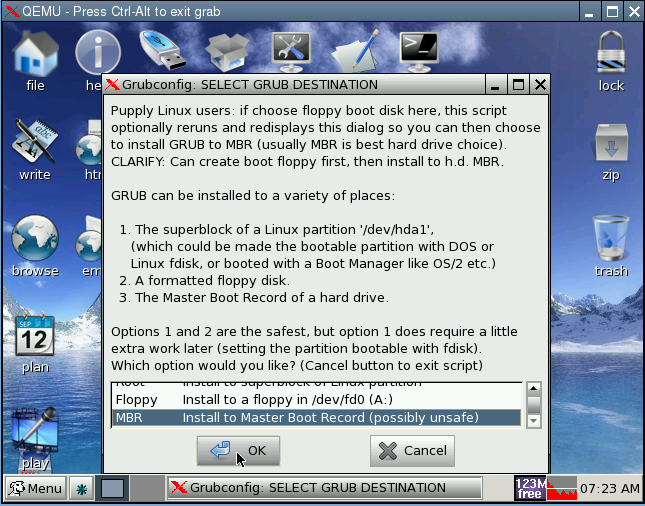
<span style="font-weight: bold">Image-34</span>
<br />
<a class="postlink" target="_blank" href="http://www.servimg.com/image_preview.php?i=64&u=12365505"><img border="0" src="http://i46.servimg.com/u/f46/12/36/55/05/3610.png" /></a>
<br />
<br />
Scroll down the list, and select MBR and click OK
<br />
<span style="font-weight: bold">Image-35</span>
<br />
<a class="postlink" target="_blank" href="http://www.servimg.com/image_preview.php?i=65&u=12365505"><img border="0" src="http://i46.servimg.com/u/f46/12/36/55/05/3710.png" /></a>
<br />
<br />
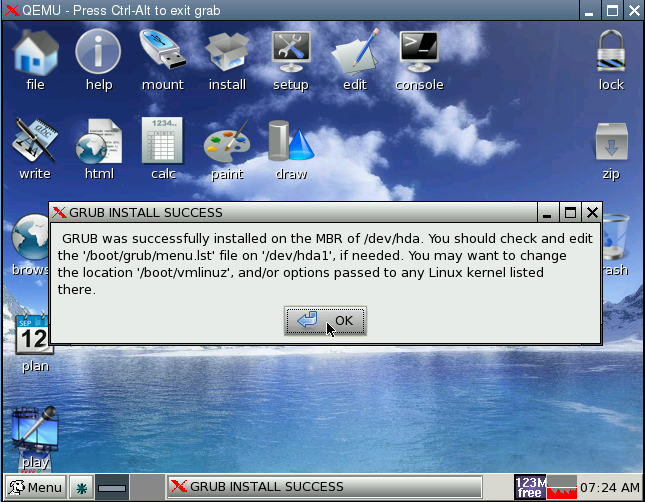
Hopefully you will get confirmation that GRUB was successfully installed
<br />
<span style="font-weight: bold">Image-36</span>
<br />
<a class="postlink" target="_blank" href="http://www.servimg.com/image_preview.php?i=66&u=12365505"><img border="0" src="http://i46.servimg.com/u/f46/12/36/55/05/3810.png" /></a>
<br />
Click OK
<br />
<br />
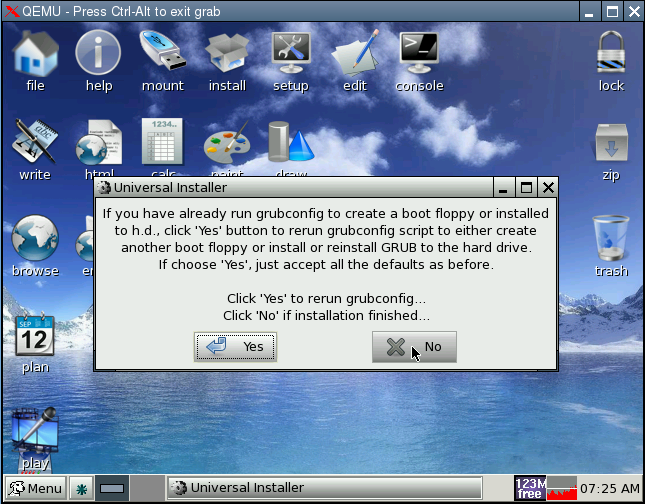
We are now finished with the Universal Installer, so click on NO
<br />
<span style="font-weight: bold">Image-37</span>
<br />
<a class="postlink" target="_blank" href="http://www.servimg.com/image_preview.php?i=67&u=12365505"><img border="0" src="http://i46.servimg.com/u/f46/12/36/55/05/3910.png" /></a>
<br />
<br />
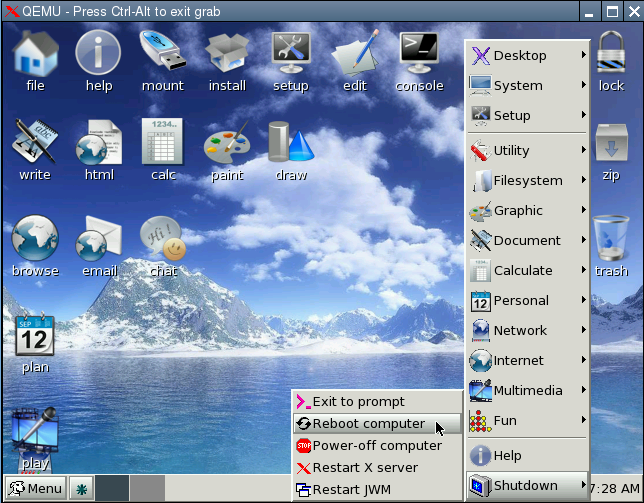
Now REBOOT (REMOVE the CD from the drive first)
<br />
<span style="font-weight: bold">Image-38</span>
<br />
<a class="postlink" target="_blank" href="http://www.servimg.com/image_preview.php?i=68&u=12365505"><img border="0" src="http://i46.servimg.com/u/f46/12/36/55/05/4010.png" /></a>
<br />
<br />
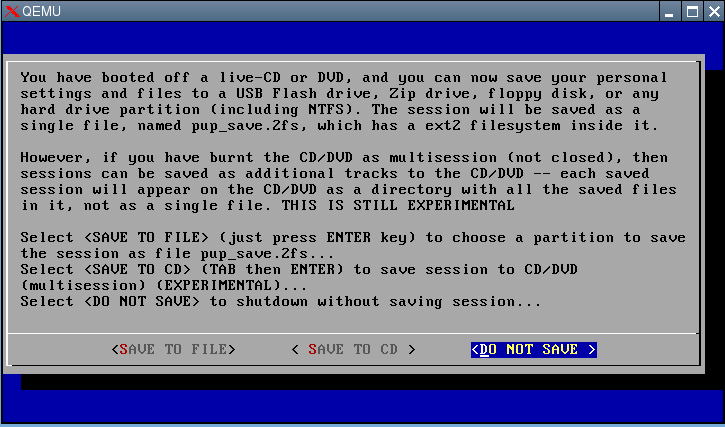
Answer NO when asked if you want to save
<br />
<span style="font-weight: bold">Image-39</span>
<br />
<a class="postlink" target="_blank" href="http://www.servimg.com/image_preview.php?i=69&u=12365505"><img border="0" src="http://i46.servimg.com/u/f46/12/36/55/05/4110.png" /></a>
<br />
<br />
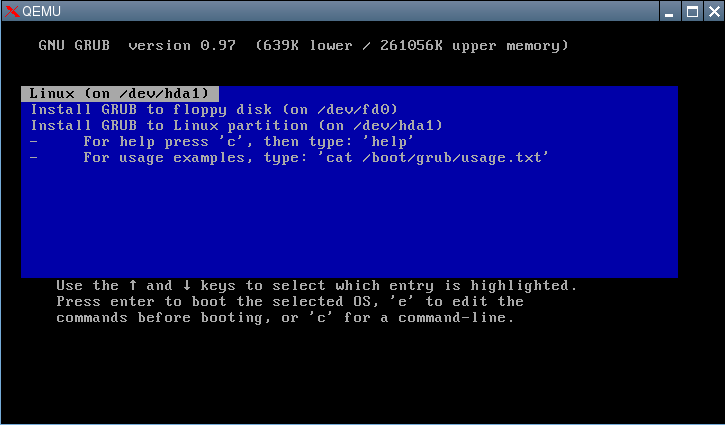
When it reboots, you should see the GRUB boot screen,
<br />
(in this case Linux (on /dev/hda1)) is already selected so just hit ENTER/RETURN
<br />
<span style="font-weight: bold">Image-40</span>
<br />
<a class="postlink" target="_blank" href="http://www.servimg.com/image_preview.php?i=70&u=12365505"><img border="0" src="http://i46.servimg.com/u/f46/12/36/55/05/4210.png" /></a>
<br />
<br />
You will need to make your choice of Keyboard Layout, and Xorg or Xvesa once again.
<br />
<br />
When you get to the desktop, that is it done.
<br />
<br />
Next time you reboot, after selecting the partition to boot via GRUB you should go straight to the desktop.
<br />
<br />
<br />
CatDude
</p>
<h1>Appendix</h1>
<p>
[data from previous articles]
</p>
<h2> install</h2>
<div class="indent">
1. Use Gparted from the Control Panel menu to create an ext3 and linux swap partition. Maximum size of the swap partition should be 2 x RAM.<br />
2. Use the Puppy Universal Installer from the Setup menu to perform a NORMAL install.<br />
3. When prompted, put Grub's boot loader in the MBR of the hard drive. The other Grub files will be placed in a /boot directory on the ext3 partition
</div>
<br />
A laptop with 128Mb RAM or more would best be served by a FRUGAL install. After Step 1 above:<br />
<br />
<div class="indent">
1. Copy vmlinuz, initrd.gz, pup_212.sfs and zdrv_212.sfs to the / directory of the hard drive.<br />
2. Use the Grub bootloader config program from the Control Panel menu to install.<br />
3. Edit the /boot/grub/menu.lst file to read<br />
Quote:<br />
title <a title="Create this page" class="missingpage" href="http://puppylinux.org/wikka/PuppyLinux/edit">Puppy Linux</a><br />
root (hd0,0)<br />
kernel (hd0,0)/vmlinuz pmedia=idehd<br />
initrd (hd0,0)/initrd.gz
</div>
<br />
Note: the .sfs files have to be in the / directory, but the vmlinuz and initrd.gz files can also be copied to a sub-directory e.g. /puppy212;<br />
in this case the GRUB entries need to be changed accordingly to show the path to these files like:<br />
<div class="indent">
kernel <b>/puppy212</b>/vmlinuz pmedia=idehd<br />
initrd <b>/puppy212</b>/initrd.gz
</div>
This is needed when installing multiple versions of puppy, where for each version the vmlinuz and initrd.gz files have to be copied to their own sub-directory since these names do not change with the version (but all .sfs files for all versions in the / directory).<br />
<div class="indent">
<br />
</div>
<h3>Hard Disc Drive Install</h3>
<br />
<h3>Update for 2.xx Universal Installer Bug</h3>
1) boot <a href="http://puppylinux.org/wikka/LiveCD">LiveCD/DVD</a>;<br />
2) run GParted and create 2 partitions<br />
<ol type="2">
<li> One(1) 0.5GB plus Primary ext3 (1.5Gb to 2.5Gb should be plenty for most users);
</li>
<li> One(1) 2 x RAM (max 0.5Gb) Primary linux-swap;</li>
</ol>3) run Puppy Universal Installer, pick IDE (ATA) internal Drive installation<br />
4) install onto the ext3 partition you created<br />
5) follow the on-screen direction from this point<br />
6) when prompted, install the GRUB bootloader to MBR of the drive.<br />
<br />
2 partitions to choose from straightens out the script, and you'll want a swap area of some type anyway. <br />
<br />
<a href="http://puppylinux.org/wikka/HardDiskInstall">See also Installing Puppy Linux to Your Hard Drive</a><br />
<br />
<h2><b>How to make a bootable hard drive that is dedicated to Puppy Linux.</b></h2>
<div class="indent">
<i>For Linux Newbies.</i>
</div>
<br />
<div class="indent">
Why would you want to do this?<br />
Because you want to experiment with reconfiguring Puppy. (And maybe all the other wonderful Puppy features for saving configuration info are not quite working for you yet.)
</div>
<br />
<b>Is this easy?</b><br />
<div class="indent">
NO. If you have a hard drive that you are prepared to dedicate completely to Puppy, it should be easy, but if you are new to Linux it is not. Yet. You cannot just press a button and have Puppy take over the hard drive.
</div>
<br />
<b>Why isn't it easy?</b><br />
<div class="indent">
Mostly, because no one has done the work yet to make it easy. (Maybe you will fix this? Someday.)<br />
The available Puppy hard disk install process is too timid. It wants to coexist with other uses of the hard disk. This means in most cases using a boot floppy to get Puppy started from the hard disk. Maybe that is what you want. But if you want to take over the hard drive and have Puppy be bootable and self contained, read on.
</div>
<br />
<b>What size HDD do I need?</b><br />
<div class="indent">
A minimal hard drive install seems to use about 100MB. So 200MB might be a minimum. 500MB to 1GB should be plenty for most experimental purposes. You might need more for heavy-duty re-compiling re-mastering etc. So, most any old scavenged hard drive that is not defective should be plenty big. And you might want to avoid drives over 8GB if you want to experiment with transplants into older computers, which can have problems with larger drives.
</div>
<br />
<b>The rest of this assumes that you will be choosing OPTION-2 in the install procedure.</b><br />
<br />
In order to have a bootable hard drive, four steps have to succeed:<br />
1) PARTITION (Pdisk, fdisk, cfdisk)<br />
2) FORMAT (mkfs, mke2fs?)<br />
3) LOAD PUPPY SOFTWARE (Option-2)<br />
4) MAKE BOOTABLE (Grub, MBR)<br />
<br />
The OPTION-2 script handles most of this OK -- except unfortunately for Step 1 - Partition. Partitioning and Formatting are actually somewhat separate and potentially rather complex matters. The script is likely to need you to take care of Step 1 manually.<br />
Steps 2-4 the script should be able to walk you through and it should do most of the hard work. (Even if your goal is a bootable hard drive, it will encourage you to make a boot floppy, too. Not much harm in having one for back-up, but it does add another tedious step to the process, and you can choose to skip it.)<br />
<div class="indent">
<br />
<b>IF</b> you are trying this with Puppy 1.0.5, there is a bug in the process; you may end up with a hard drive that partially runs, but cannot start X (the windows-graphics interface) up. You may be able to cure this by booting from a CD and copying /usr to the hard drive. Or by patching 1.0.5. Or by researching more about the bug, in the forums. But the easiest cure is to use 1.0.6.<br />
<br />
<b>IF</b> you have an existing FAT (<a title="Create this page" class="missingpage" href="http://puppylinux.org/wikka/Fat12/edit">Fat12</a>/<a title="Create this page" class="missingpage" href="http://puppylinux.org/wikka/Fat16/edit">Fat16</a>) MS-DOS type partition, OPTION-2 will try to convert it, but will probably fail. You might as well delete the partition. You can do this by fiddling with PDISK, or use other tools if you are more familiar/comfortable with them.<br />
<br />
<b>IF</b> you have an existing partition of just the type that Puppy wants (perhaps you are updating Puppy) you will probably be in trouble! Because Puppy probably already mounted the partition during your last boot, in order to use it. Because it is mounted, the update process will refuse to change it! You will have to find a trick to boot from the CD without using/mounting that partition. One way to do this is use PDISK to delete the partition. Fortunately, PDISK is too dumb to realize that it should not allow you to delete a partition that you are using! So you can just delete the partition (this just removes the MBR partition entry), then reboot.<br />
<br />
<b>IF</b> you have no partitions on the hard drive, OPTION-2 will fail. You will need to use PDISK or some other method to create a partition. Then at long last you may actually be able to successfully run OPTION-2 and make a hard drive that can boot itself with GRUB.<br />
<br />
(What we really need is a new OPTION-3: NUKE THE HARD DRIVE, IGNORE ANY EXISTING CONTENTS, WRITE ZEROES TO SECTOR 0, AND MAKE A BOOTABLE PUPPY HARD DRIVE.)
</div>
<br />
-k 18nov05<br />
<br />
<a href="http://puppylinux.org/wikka/PdisK">Pdisk</a><br />
<br />
<br />
<b>What if this isn't working for me?</b><br />
<div class="indent">
First, make sure that you can actually boot from that hard drive in that computer. Do this by using some tool to wipe the hard drive clean and installing a bootable test system on it, like a simple minimal MS-DOS 6.22.
</div>
If that works, be aware that left over data on the hard drive could be confusing things. Changing partitioning and formatting are actually separate and quite confusing matters. The better you wipe the drive to all zeroes, the less potential for confusion. In most cases just zeroing the first sector (the MBR) should give you a fresh start, but if things aren't working try zeroing out the whole volume. Look into making sure the drive is not only properly partitioned, but also FORMATTED if necessary.<br />
You could try avoiding fdisk and using cfdisk instead, since it has a better reputation.<br />
<br />
<a href="http://puppylinux.org/wikka/HardDriveInstallBruce">HardDriveInstallBruce</a><br />
<a title="Create this page" class="missingpage" href="http://puppylinux.org/wikka/BruceB/edit">BruceB</a> excerpts from the Forum<br />
<br />
See Also:<br />
<a class="ext" href="http://www.murga.org/~puppy/viewtopic.php?t=3665∞">http://www.murga.org/~puppy/viewtopic.php?t=3665∞</a><span class="exttail">∞</span>;<br />
Post subject: HD install routine<br />
Apologies if someone has already sussed this, but installing Puppy to HD can be very problematic...<br />
<br />
<br />
Posted: Sat Nov 12, 2005 8:50 pm<br />
The purpose of my post is to explain some of the obstacles could encounter in an Option 2, and techniques a person could use. And ramble on some.<br />
<br />
Puppy's default creates a pupxxx user file on a filesystem it deems the best one to use. This might not be the filesystem you would have liked it to create the pupxxx file. There are many ways to control where the pupxxx file is created and how large it is. But the default is to let Puppy make this decision.<br />
<br />
One problem people have when attempting to do an Option 2 install is that they want to install on the same partition that the 'mounted' pupxxx file is on.<br />
<br />
The install routine will not install on a 'mounted' partition.<br />
<br />
One work around is: at boot time don't let Puppy mount the pupxxx file at all. This way the partitions will be unmounted and likely available for an Option 2 install.<br />
<br />
At install time, Puppy will give a you a list of available partitions to install to.<br />
<br />
<hr />
<br />
Changing subject a little. I think a lot of people conceptualize Linux as mounting drives and / or partitions, which it does do. I'd like to sell the idea of conceptualizing Linux as an operating system that mounts filesystems. For an example, the way the Puppy uses the pupxxx file is:<br />
<br />
1) it mounts the filesystem where the pupxxx file is on<br />
2) it mounts the pupxxx file as a filesystem<br />
<br />
The result is: One partition mounted with two separate mounted filesystems.<br />
<br />
<br />
<hr />
<br />
More change of subject.<br />
<br />
Marking a FAT filesystem as hidden doesn't hinder Linux' ability to mount and use the filesystem. Although, it could be that the Puppy install scripts deal with hidden FAT partitions in different ways, according to the scripting.<br />
<br />
<hr />
<br />
About DOS Fdisk programs:<br />
<br />
The DR DOS fdisk only recognizes about 8 GB, it's a good FDISK otherwise. If you format a partition with DR DOS format, it will be a good format. If MS-DOS / Windows accesses that filesystem it will damage it.<br />
<br />
The PC DOS (IBM) fdisk won't access large drives either.<br />
<br />
<a title="Create this page" class="missingpage" href="http://puppylinux.org/wikka/FreeDOS/edit">FreeDOS</a> fdisk, sys and format utilities had the same problem with MS-DOS behaving destructively against their work. The <a title="Create this page" class="missingpage" href="http://puppylinux.org/wikka/FreeDOS/edit">FreeDOS</a> community was informed about the cause of puzzling behavior MS-DOS on their filesystem. They corrected the problems in July 2004.<br />
<br />
DR DOS version 8.0 corrected the problem, the 7.03 version still leaves itself wide open to the MS-DOS bad behavior.<br />
<br />
Simply stated the Microsoft Operating system thru virtually all DOS and Windows versions through ME do this: It reads a text field in the boot sector of each FAT partition and adjusts behavior according to the text string it finds. This eight text string is called the OEM ID field.<br />
<br />
It is officially denied that Microsoft uses this field in its specifications and other places. Programmers naive enough to believe the official documentation fall into a trap sometimes of writing an OEM text string that triggers MS bad beahvior and don't know what is going on because they did everything right (or so they think).<br />
<br />
As far as FDISK programs go, if you are working with big drives, MS Fdisk and <a title="Create this page" class="missingpage" href="http://puppylinux.org/wikka/FreeDOS/edit">FreeDOS</a> Fdisk are viable options. Generally, I use the MS fdisk on big drives, (any drive for that matter).<br />
<br />
It is however helpful to understand its personality as well as some Puppy limits.<br />
<br />
Puppy's compilation will only recognize up to 9 partitions per hard drive. Considering that the extended partition is not mountable, this means with Puppy you can have up to 8 working partitions per hard disk.<br />
<br />
Typically, people set up a primary, then extended, then logical partitions. Doing it that way, they might end up with something like this:<br />
<br />
hda1 primary<br />
hda4 extended (and unmountable)<br />
hda5 logical<br />
hda6 logical<br />
hda7 logical<br />
hda8 logical<br />
hda9 logical<br />
<br />
If your scheme does look like this you've reached the Puppy limit of 6 as there is no device driver for hda10 and you don't have an hda2 and hda3<br />
<br />
In order that I can have 8 usable partitions I do it like this:<br />
<br />
hda1 primary<br />
hda2 primary<br />
hda3 primary<br />
hda4 extended (and unmountable)<br />
hda5 logical<br />
hda6 logical<br />
hda7 logical<br />
hda8 logical<br />
hda9 logical<br />
<br />
<br />
MS-DOS Fdisk will not create hda2 primary or hda3 primary. Linux cfdisk would create these partitions, but if you used MS-DOS Fdisk to make the extended partition AND you marked hda2 and hda3 as Linux partitions, MS-DOS Fdisk would write the partition inside the Linux partition and make things unusable. If you marked hda2 and hda3 as FAT with Cfdisk, then MS-DOS Fdisk will put the extended partition where it belongs. This is probably very unintentional on MS' part.<br />
<br />
There are also other DOS based fdisk utilities that will make hda2 and hda3. Aefdisk will do it and I'm pretty sure the <a title="Create this page" class="missingpage" href="http://puppylinux.org/wikka/FreeDOS/edit">FreeDOS</a> fdisk will do it.<br />
<br />
One point I wish to make is that using DOS based fdisk utilities, I can create complex Linux partitioning schemes. In the example above, after I setup the partitions, I'd use the DOS aefdisk to mark each partition according to the filesystem I wish it to contain.<br />
<br />
If for example I wanted hda9 to be a Linux swap filesytem, I'd mark it as type 82, then when I boot Linux I'd format it accordingly.<br />
<br />
<hr />
<br />
As far as PQmagic is concerned. It is a very powerful tool. But if you use it, you may get stuck with it as your partitioning tool.<br />
<br />
Suppose I wanted to delete logical partitions hda8 and hda9. If I do it with Linux fdisk or MS fdisk, I still have free space in the extended partition. I can then make other partitions in the extended partition.<br />
<br />
If I delete hda8 and hda9 with PQmagic, it resizes the extended partition to contain hda5 thru hda7. You still have free space on the hard drive, but it is not in the extended partition. What to do? Use PQmagic to handle the free space, as other utilities might not be able to, or give you results you don't want.<br />
<br />
I'm not trying to knock PQmagic, I think enough of it that I purchased three version over the course of years. But it does do what it does.<br />
<br />
<br />
<hr />
<br />
In conclusion: I think the easiest why to prepare for an Option 2 install, is mark the partition you want to install it on as type 83, don't format it. Boot Puppy and it won't mount that partition because there is no filesystem on it to work with. It will therefore be available as a useable, properly marked, and unmounted partition for Puppy to install on.<br />
<br />
<br />
= = = = = = = = = = = = =<br />
<br />
Posted: Tue Nov 15, 2005 5:00 am<br />
<br />
OPTION 1 HARD INSTALL VS. BOOTING FROM CD DISC<br />
<br />
The Option 1 install will boot a lot faster than the CD disc. The reason why is, the computer can read the hard disk faster than a CD disc. There are about 60 MB worth of data that has to be located and read.<br />
<br />
Once the computer has been booted the actual operation theoretically should be identical. The three key files necessary to boot Puppy only get read one time, and they are not used or needed again.<br />
<br />
An exception would be on a low memory system. The file usr_cram.fs normally gets copied to RAM then mounted as a file system. If Puppy calculates that the computer doesn't have enough RAM to copy usr_cram.fs into RAM, it will mount it and read it as needed from where it is.<br />
<br />
<br />
OPTION 2 INSTALL VS. OPTION 1 HD INSTALL<br />
<br />
Puppy will boot markedly faster with Option 2 than with Option 1. The principle reasons are that it doesn't need to copy usr_cram.fs to RAM, and it doesn't need to setup and configure a file system, as the file system is already in place and ready to go.<br />
<br />
Read operations will be slower from hard disk than RAM, simply because the hard disk is slower. On the other hand the files read don't go through the same decompression process. In actual practice the computer should be able to locate and read a small file off the hard disk so fast you wouldn't notice the read time.<br />
<br />
If you were to launch a large program like Mozilla, it should take 'noticably' longer time to read it from the hard disc as it would from RAM.<br />
<br />
Once Mozilla's working components are loaded in memory, they should run about the same speed.<br />
<br />
Except for the very fast boot, an Option 2 is slower in some areas of operation than an Option 1.<br />
<br />
There is an exception to this rule and that is with low memory systems. An Option 1 uses up considerably more RAM space than an Option 2, because all the filesystem is in RAM and taking up space, except for /root and whatever you have mounted yourself.<br />
<br />
If your computer doesn't have sufficient RAM and is actively using a swap file system for its normal operations on an Option 1, it is very likely that it would run faster with an Option 2 because there is more RAM to work with before it needs to swap.<br />
<br />
<hr size="2" width="100%" />
<br />
For Quick hard disk installs of Puppy 1.03 to 1.05 (in separate partition or in <a href="http://puppylinux.org/wikka/WinXP">WinXP</a>)<br />
<a class="ext" href="http://ph-islands.net/pupinstall/">TRY THIS Tutorial FIRST</a><span class="exttail">∞</span><br />
<br />
<a href="http://puppylinux.org/wikka/HardDriveInstall">See also Hard Drive Install / Hard Disk Install BOOTABLE</a><br />
<br />
<h3>Step by Step: Installing Puppy Linux to Your Hard Drive</h3>
<h5>A Linux Newbie Guide</h5>
<br />
This tutorial shows you how to install Puppy Linux to a DOS formatted HD. To install Puppy<br />
onto a HD with a pre-existing OS present (i.e. Windows) to achieve a dual boot setup, is<br />
<div class="indent">
not covered in this how-to (you should check <a href="http://puppylinux.org/wikka/Installing">Installing</a> and look for frugal install). If you follow this sequence, you'll end up with a HD with only
</div>
Puppy Linux and MS-DOS installed.<br />
<br />
<h5>Software You Need:</h5>
1. A bootable copy of <span class="underline">Puppy Linux 1.0.4</span>
on a CD. Make sure it is Checksumed before burning the ISO (link), make
sure it is burned properly (link), and check to make sure that it is
actually bootable by actually booting it. <br />
2. <span class="underline">Darik's Boot and Nuke</span>
(DBN) on a Floppy or another disc-wiping program. (This is necessary
for disc 'wiping' or erasing which is an optional process.)<br />
3. <span class="underline">MS-DOS 6.22</span> - usually on 3 floppy discs.<br />
<br />
To format your Hard Drive, you could install MS-DOS onto your HD, then run 'format c:'<br />
I prefer totally wiping out the HD using DBN, then installing MS-DOS.<br />
<br />
Let's begin.<br />
<br />
<b>Important: </b><br />
<b>Before Beginning Install</b><br />
If your computer has more than one CD/DVD device, then before<br />
installing Puppy, DISABLE the non-install media device.<br />
<br />
This means, if you have both a CD-ROM and a DVD device, and<br />
you will install Puppy from the CD-ROM, then disable the DVD<br />
device by unplugging the power supply to the DVD. Open the <br />
computer case to do this, and then pull out the power plug to <br />
the DVD.<br />
<br />
The reason, is that during install, if more than one CD/DVD device<br />
is present on your computer, Puppy Linux is unable to Mount &<br />
Unmount the install device - so you can't install Puppy.<br />
<br />
<br />
<h4>1. DBN How:</h4>
1. Put the DBN floppy in the drive and restart the computer (the BIOS might have to be<br />
adjusted to boot from floppy).<br />
<br />
2. DBN will load. At the first prompt ("boot:") type <span style="color: blue">quick</span> then press <span style="color: blue">Enter</span>. DBN will now<br />
start to erase the HD. This will take between 15 and 60 minutes - or longer - depending<br />
on the capacity of your HD. Remove the DBN floppy as soon as the wipe sequence starts.<br />
<br />
DBN will go through 1 wipe cycle. You can see the % completed in the large bottom window, <br />
far left. (I now turn off the monitor, and go and do something for an hour). If you get bored, <br />
you can abort the wipe at any stage and still have a wiped HD - although not fully wiped. <br />
When finished, partition HD & install MS DOS.<br />
<br />
<br />
<h4>2. Partition HD using fdisk, then install MS-DOS: Boot with MS-DOS Start Up disk. At A:\> prompt, type <span style="color: blue">fdisk</span>. you will now create<br />
a Primary Dos Partition of <span class="underline">at least</span> <span style="color: red">256</span> Mb (to install pup001 at Puppy boot).<br />
<br />
1. Enter choice <span style="color: blue">1</span> > <span style="color: blue">1</span> > <span style="color: blue">N</span> ("Do you wish to use maximum...") > type <span style="color: blue">256</span> (partition size)<br />
> <span style="color: blue">2</span> (set active partition) > <span style="color: blue">1</span> (number of partition).<br />
<br />
2. <span class="underline">Restart</span>, insert MS-DOS Disk 1, and at <b>A:\></b> type <span style="color: blue">setup</span> > choose <span style="color: red">Format this drive</span>.<br />
This will format the 256 Mb partition you've just created - not the entire HD.<br />
<br />
3. Follow standard, 3 disk, Dos install.<br />
<br />
<br />
<h4>3. Puppy Linux Install:</h4>
"<b>Use <a title="Create this page" class="missingpage" href="http://puppylinux.org/wikka/Wakepup2/edit">Wakepup2</a></b>" for older machines that cant boot from CD <a class="ext" href="http://www.murga-linux.com/puppy/viewtopic.php?t=7979">http://www.murga-linux.com/puppy/viewtopic.php?t=7979</a><span class="exttail">∞</span> <br />
1. Boot from Puppy CD. At Puppy splash-screen "boot:" press <span style="color: blue">3</span>. <br />
2. At Red Text, type <span style="color: blue">hda1</span> then <span style="color: blue">Enter</span> (for pup001 default).<br />
3. Choose <span class="underline">br-latin1-us</span> keyboard, select mouse, etc.<br />
In Puppy desktop, choose a resolution (800 X 600 is good). <br />
4. In Puppy desktop, <b>rvxt</b> > type <span style="color: blue">cfdisk</span>.<br />
5. In cfdisk > <b>Pri/Log</b> > <b>New</b> > <b>Primary</b> > <b>Size</b> = at least <span style="color: red">500 Mb</span> ><br />
<b>Beginning</b> > <b>Write</b> > <span style="color: blue">Yes</span> > <b>Quit</b>.<br />
<br />
<span class="underline">Now in cfdisk, you should see something like this</span>:<br />
<br />
<tt>hda1. . . .Boot. . .Primary. . . .FAT16. . . .[MS-DOS 6]. . . .271.44<br />
hda2. . . . . . . ..Primary. . . .Linux. . . . . . . . . . . 501.75<br />
hda3. . . . . . . .. Pri/Log. . . .Free Space. . . . . . . .3536.88</tt><br />
<br />
6. Now, quit <b>rxvt</b>, and -- <span style="color: red">REBOOT (with Puppy CD still inside)</span>.
IMPORTANT STEP! REBOOT! Many online sources never state this step which
can then cause failed installations. When exiting Puppy, select 'DON'T
save changes' when asked.<br />
<br />
7. At Puppy splash-screen "boot:" press <span style="color: blue">3</span> > press <span style="color: blue">Enter</span> (for pup001). <br />
You should now go directly to Puppy desktop.<br />
8. <b>Start</b> > <b>Setup</b> > <b>Install Puppy hard drive</b>.<br />
9. "Make your choice": type <span style="color: blue">2</span>.<br />
10. STEP 1: press <span style="color: blue">Enter</span>.<br />
11. STEP 2: type <span style="color: blue">/dev/hda2</span> then press <span style="color: blue">y</span>.<br />
12. STEP 3: press <span style="color: blue">Enter</span> (to get "vmlinuz" off live-CD). CD-ROM will then eject.<br />
13. Remove CD-ROM.<br />
14. STEP 4: press <span style="color: blue">m</span> (or any key) then <span style="color: blue">Enter</span> (for no boot floppy).<br />
15. STEP 5: Computer will now write tables (inode etc.) and copy files and directories.<br />
16. STEP 7: GRUB install; press <span style="color: blue">m</span> then <span style="color: blue">Enter</span> (to install GRUB).<br />
<br />
<span class="underline">GRUBCONFIG V 1.24</span><br />
Choose the following:<br />
1. simple - (Try to install GRUB automatically) = OK.<br />
2. standard - (Use the standard Linux console - the safe choice) = OK.<br />
3. SELECT GRUB PARTITION - /dev/hda2 = OK.<br />
4. SELECT GRUB DESTINATION - select <span style="color: red">MBR</span> = OK.<br />
5. Continue clicking on OK boxes until - GRUB INSTALL SUCCESS.<br />
<br />
<h4>Final Steps:</h4>
1. Now, <span style="color: red">REBOOT</span>, and at GNU GRUB 0.96, choose: INSTALL GRUB TO LINUX PARTITION.<br />
<br />
2. <span class="underline">Post Installation Tweak to Grub Boot File</span>:<br />
When you reboot your computer, you'll be presented with a GRUB boot option<br />
of either booting into MS DOS or Linux. If you want to configure the start<br />
sequence to automatically boot into Linux, you must edit the <span style="color: purple">menu.lst</span> file:<br />
<br />
<span class="notes">NOTE: <br />
3. <span class="underline">How to edit the menu.lst file</span>:<br />
A. In Puppy Desktop > <b>rox</b> > <b>parent directory</b> > <b>boot</b> > <b>grub</b> > <b>menu.lst</b>.<br />
B. Open the <b>menu.lst</b> file.<br />
C. Cut these 3 lines...<br />
<br />
<span style="color: blue">title Linux (on /dev/hda2)</span><br />
<span style="color: blue">root (hd0,1)</span><br />
<span style="color: blue">kernel /boot/vmlinuz root=/dev/hda2 ro vga=normal</span><br />
<br />
and paste them below this line...<br />
<br />
<span style="color: blue"># Other bootable partition config begins</span><br />
<br />
<br />
D. Now, you can set the timeout value:<br />
<br />
In the line<br />
<br />
<span style="color: blue">#timeout 30</span><br />
<br />
CHANGE the 30 into 10, and REMOVE the <span style="color: blue">#</span> at the beginning<br />
of the line (you can specify the timeout value to whatever <br />
you like). Save & exit.<br />
<br />
Now, when you start computer, it will auto-boot into<br />
Puppy in 10 seconds. <br />
<br />
Ends. <br />
<br />
<hr />
<br />
<h3>Puppy 1.0.3 Option 2 install</h3>
<br />
<b>This is a fresh Hard disk install</b><br />
<br />
<ul>
<li> Boot up with Puppy but select <b>Option 2</b> when the splash screen comes up
</li>
<li> Go to Hard disk Install and choose option 2
</li>
<li> Type in <b>/dev/hda1</b> (or the number of your hard disk)
</li>
<li> Hit j and enter (that is an example any key)
</li>
<li> Hit j and enter again
</li>
<li> Choose MBR as area for GRUB to boot (I chose dev/hda1 as I was using a non Linux partition)</li>
</ul><hr />
<br />
<h5> Clearing the master Boot Record </h5>
One way you might could wipe the MBR is to boot up your machine using a
Windows 98 boot-up diskette, which contains among other things, FDISK.<br />
At the A:> prompt, type fdisk /mbr, press Enter, and see what happens.<br />
<br />
<h5> Installing to a hard drive </h5>
<span class="notes">' Warning</span>' this sections only goes up to section 6 (as that is as far as I know)<br />
<br />
It is not possible with version 0.9.9 to install automatically to a hard disk.<br />
Best bet is booting from a CD allowing Puppy to store its configuration details on any available HD<br />
<br />
<br />
# Creating live-CD Puppy by download the latest "puppy-xxxx.iso" file,
which is a complete CD image, and burn it to CD or order from Barry -
only $10<br />
# Change your bios setting to boot from CD<br />
# Prepare your hard disk<br />
<div class="indent">
<span class="notes">If the hard disk is vfat (FAT16
and FAT32) - (not NTFS) - that is older versions of Windows this is OK
and Puppy will create a file on these disks. Vfat and NTFS are the way
your hard disk stores data - known as formatting. Linux users should be
using ext2 ext3 or Resier(?)</span><br />
<span class="notes">If you are using a new or unformatted disk - which
I am just about to try then you must use fdisk (or similar) to create a
partition and format it - this requires some DOS knowledge</span><br />
<span class="notes">The install script is very cautious. It does not
alter any partitions on your hard drive, nor does it touch the MBR
(Master Boot Record). It creates a boot floppy disk. It does copy
image.gz (Puppy himself) (and also file usr_cram.fs if it exists) onto
a partition, but they are just files, so the partitions are not messed
around with at all.</span><br />
* To prepare the hard disk I used Knoppix to boot up and qtparted to partition
</div>
<i>remember to commit (create) and format the partitions</i><br />
<br />
<br />
# Boot from puppy<br />
# Go to Start / Set up / Install to Hard Drive<br />
# You will be given two options - we will be using option 2 <br />
<br />
2. Give Puppy his own partition. There are a few ways this can be<br />
done, but this script requires that you have a spare partition<br />
that Puppy can take over entirely. This option is recommended for<br />
anyone interested in developing applications for Puppy, as it<br />
gives the most flexibility. With this option, Puppy does NOT run<br />
in a ramdisk, and /usr folder is read-write.<br />
Option 2 requires a pre-existing spare partition. Puppy will<br />
convert it to ext2 filesystem. PARTITION WILL BE ERASED!<br />
<br />
Got as far as Step 6 of the script<br />
<br />
This message came up:<br />
<br />
"Now creating ext2 filesystem on /dev/hda1/ etc . . .<br />
<br />
mkfs:ext2:bad blocks count - <a title="Create this page" class="missingpage" href="http://puppylinux.org/wikka/ExtFs/edit">ExtFs</a>"<br />
<br />
<br />
<h5> Alternative HD Install Method </h5>
<span class="notes">'Configure LILO for hard-Puppy</span>'<br />
<span class="notes">WMCreate contributed this to the old forum:</span><br />
<br />
I'd had some difficulty getting Puppy Linux to work happily<br />
with Lilo on a hard drive. And, from searching the 'net and<br />
this forum, I see that I'm not alone.<br />
<br />
So, what follows is the solution that I came up with.<br />
YMMV.<br />
<br />
Using Partition Magic 8.0, I created a 600MB primary FAT32<br />
partition. (I tried using a logical/extended partition but<br />
things wouldn't work right). In my case, it became<br />
partition#4 (hdd).<br />
<br />
If you don't have Partition Magic, you can use QTparted on<br />
the bootable <a title="Create this page" class="missingpage" href="http://puppylinux.org/wikka/SystemRescueCD/edit">SystemRescueCD</a> ( <a class="ext" href="http://www.sysresccd.org">http://www.sysresccd.org</a><span class="exttail">∞</span> ).<br />
And, if you can't boot CD's, you can use the Smart Boot<br />
Manager floppy disk ( <a class="ext" href="http://btmgr.sourceforge.net/">http://btmgr.sourceforge.net/</a><span class="exttail">∞</span> ) to<br />
change that.<br />
<br />
Note: If you use <a title="Create this page" class="missingpage" href="http://puppylinux.org/wikka/QtParted/edit">QtParted</a> to make a FAT32 partition, you<br />
should use a <a title="Create this page" class="missingpage" href="http://puppylinux.org/wikka/Win98SE/edit">Win98SE</a> boot floppy to format the partition (no<br />
system files). I couldn't get QTparted to format a<br />
partition for me - something that Partition Magic does with<br />
ease. Also, I've had problems using the <a title="Create this page" class="missingpage" href="http://puppylinux.org/wikka/FreeDOS/edit">FreeDOS</a> (more on<br />
that to come, <a class="ext" href="http://www.freedos.org">http://www.freedos.org</a><span class="exttail">∞</span> ) format command, so I<br />
recommend using the format command from a Windoze or DOS<br />
boot diskette (or using Partition Magic to format).<br />
<br />
I now had:<br />
hda=<a title="Create this page" class="missingpage" href="http://puppylinux.org/wikka/Win98SE/edit">Win98SE</a> FAT32 10GB<br />
hbb=Linux EXT3 8GB<br />
hdc=Linux SWAP 1.4GB<br />
hdd=<a title="Create this page" class="missingpage" href="http://puppylinux.org/wikka/FreeDOS/edit">FreeDOS</a> FAT32 0.6GB<br />
<br />
I then booted from a <a title="Create this page" class="missingpage" href="http://puppylinux.org/wikka/FreeDOS/edit">FreeDOS</a> boot diskette and did 'sys D:'<br />
- you might have to replace the 'D:' with some other drive<br />
letter.<br />
<br />
I copied vmlinuzℑ.gz(from the Puppy Linux CD), and<br />
tiny.exe&autoexec.bat (from the Puppy Linux startup<br />
diskette) to the <a title="Create this page" class="missingpage" href="http://puppylinux.org/wikka/FreeDOS/edit">FreeDOS</a> drive.<br />
<br />
I then modified the autoexec.bat to show PHOME=hda4.<br />
<br />
And, I modified my lilo.conf to include the new <a title="Create this page" class="missingpage" href="http://puppylinux.org/wikka/FreeDOS/edit">FreeDOS</a><br />
partition. To get <a title="Create this page" class="missingpage" href="http://puppylinux.org/wikka/FreeDOS/edit">FreeDOS</a> booting correctly, I have to hide<br />
the Windoze partition and unhide the <a title="Create this page" class="missingpage" href="http://puppylinux.org/wikka/FreeDOS/edit">FreeDOS</a> partition (OK,<br />
honestly, I never have to un/hide the <a title="Create this page" class="missingpage" href="http://puppylinux.org/wikka/FreeDOS/edit">FreeDOS</a> partition, but<br />
why bother Windoze with its existence?).<br />
<br />
other=/dev/hda1<br />
label=<a title="Create this page" class="missingpage" href="http://puppylinux.org/wikka/Win98SE/edit">Win98SE</a><br />
table=/dev/hda<br />
change<br />
partition=/dev/hda1<br />
activate<br />
set=dos16_big_normal<br />
partition=/dev/hda4<br />
deactivate<br />
set=dos16_big_hidden<br />
other=/dev/hda4<br />
label=Puppy<br />
table=/dev/hda<br />
change<br />
partition=/dev/hda1<br />
deactivate<br />
set=dos16_big_hidden<br />
partition=/dev/hda4<br />
activate<br />
set=dos16_big_normal<br />
<br />
If you don't have any FAT partitions except for <a title="Create this page" class="missingpage" href="http://puppylinux.org/wikka/FreeDOS/edit">FreeDOS</a>, you<br />
can probably do this:<br />
<br />
other=/dev/hda4 # location of non-Linux OS, in this case<br />
<a title="Create this page" class="missingpage" href="http://puppylinux.org/wikka/FreeDOS/edit">FreeDOS</a><br />
label=Puppy # prompt label<br />
table=/dev/hda # partition table pass-through to the OS<br />
(might not need this).<br />
<br />
When all was said and done, I had a Puppy Linux hard disk<br />
install that only messed around inside of its own partition<br />
(that is, it creates its 500MB pup1 file inside the <a title="Create this page" class="missingpage" href="http://puppylinux.org/wikka/FreeDOS/edit">FreeDOS</a><br />
partition), and was bootable by LILO and ran itself inside<br />
RAM. Nice.<br />
<br />
<br />
<br />
Reply #1<br />
From: WMCreator (wmcreator AT collegeclub.com)<br />
Date: 07/26/2004<br />
<br />
Oops, I just noticed that some of the above comments spilled<br />
over. Read it as:<br />
<br />
other=/dev/hda4 # location of non-Linux...<br />
label=Puppy # prompt label...<br />
table=/dev/hda # partition table...<br />
<br />
<h5> Other Desktops </h5>
<br />
[<a class="ext" href="http://www.goosee.com/puppy/sforum/simpleforum_pro.cgi?fid=02&topic_id=1109374653">http://www.goosee.com/puppy/sforum/simpleforum_pro.cgi?fid=02&topic_id=1109374653</a><span class="exttail">∞</span> Using Fluxbox]<br />
<hr />
<br />
temp . . .<br />
<br />
more to follow as I av a go<br />
<br />
1. Install vmlinuz and image.gz<br />
<br />
When you boot up live-Puppy from a CD, mount the CD using "Puppy driver
mounter" (see the menu, under Start > File managers), and copy
vmlinuz and image.gz to the hard drive (and also usr_cram.fs if it
exists). let's use the Windows partition, the C: drive -- it will
probably already be mounted, at /mnt/cdrive, so use ROX to copy those
two files across. Place them in the top level "C:\" directory.<br />
2. Edit the boot manager<br />
<br />
So far I have only had experience with the Grub bootloader. Mount the
partition that has the /boot/grub directory. Right-click over the file
grub.conf and open it in a text editor. It will look something like as
follows, and you need to add the lines that I have shown in bold:<br />
<br />
<tt>default=1<br />
timeout=10<br />
splashimage=(hd0,4)/boot/grub/splash.xpm.gz<br />
title Red Hat Linux (2.4.18-14)<br />
</tt>
<div class="indent">
<tt> root (hd0,4)<br />
kernel /boot/vmlinuz-2.4.18-14 ro root=LABEL=/ hdc=ide-scsi<br />
initrd /boot/initrd-2.4.18-14.img</tt>
</div>
<tt>title DOS<br />
</tt>
<div class="indent">
<tt> rootnoverify (hd0,0)<br />
chainloader +1</tt>
</div>
<tt>title Puppy Linux<br />
</tt>
<div class="indent">
<tt> rootnoverify (hd0,0)<br />
kernel /vmlinuz root=/dev/ram0 PFILE=pup1-none-524288 PHOME=hda1<br />
initrd /image.gz</tt>
</div>
<br />
An important thing to understand here is that "(hd0,0)" refers to hda1, "(hd0,4)" is hda5 and "(hd0,2)" is hda3.<br />
<br />
Apart from editing grub.conf, nothing else is required, as the
bootloader will automatically look at that file during booting. Some
other bootloaders may need an extra step to install the changes.<br />
3. Reboot<br />
<br />
That's it, Puppy should start<br />
<br />
When you get Puppy installed in this very cautious way, you might like
to read further down this page to the "take two" instructions, to see
how to configure a boot manager.<br />
<br />
Puppy v0.9.0 added an extra option to the install-to-hard-drive script.
"Option 2" is to install Puppy such that no ramdisk is used. This
requires that Puppy take over an entire partition. It is up to you to
have such a spare partition. The script will convert it into an ext2
filesystem, if it wasn't before.<br />
Option 2 is good for developers, as the /usr folder is not compressed and is read/write.<br />
<br />
Puppy v0.9.8 added an "upgrade" option to the install script, if you
are upgrading from a previous installation. All you do is download the
latest live-CD ISO file, burn it to CD, boot up on it, then run the
install-to-hard-drive script and when it asks whether you are doing a
new installation or upgrade, you answer appropriately.<br />
<br />
<br />
<hr />
<br />
<b>Simple Grub:</b> <br />
<div class="indent">
<br />
This is a simple intro to Grub for people who have Puppy installed as the only operating system on a hard drive in a ext2fs.<br />
If other filesystems are used I can post the stage1_5 files required.<br />
If you dont like this or find it confusing please post a reply as this is a tentative attempt to supply some information.<br />
<br />
<br />
<a class="ext" href="http://www.goosee.com/puppy/sforum/simpleforum_files/attachments/pup-grub.tar.gz">http://www.goosee.com/puppy/sforum/simpleforum_files/attachments/pup-grub.tar.gz</a><span class="exttail">∞</span>
</div>
<br />
<hr />
<br />
<b>Simple HD install with Grub bootmanager</b> <br />
<div class="indent">
<br />
Requirements:<br />
* Puppy live CD<br />
* grub executable and files /boot/grub/* - get: <a class="ext" href="http://www.goosee.com/puppy/sforum/simpleforum_files/attachments/Grub.zip">http://www.goosee.com/puppy/sforum/simpleforum_files/attachments/Grub.zip</a><span class="exttail">∞</span>
</div>
<br />
<div class="indent">
Steps:<br />
1. boot off puppy live cd<br />
2. cfdisk hda - create hda1 bootable partition of type linux (min. 400MB). save your work!<br />
3. mkfs.ext2 /dev/hda1 - create ext2 file system on hda1.<br />
4. get access to grub executable. Use my grub.zip file. unzip. you should see grub (elf exe) and<br />
directory boot/grub/* with file menu.lst. menu.lst is already setup for Puppy on hd(0,0) (hda1) only!<br />
5. copy required file to hda1:<br />
5.1 mount puppy live cd via drive mounter wizard (mount /dev/hdc /mnt/cdrom).<br />
5.2 mount /dev/hda1 /mnt/data<br />
5.3 cp /mnt/cdrom/vmlinuz /mnt/data<br />
5.4 cp /mnt/cdrom/image.gz /mnt/data<br />
5.5 cp /mnt/cdrom/usr_cram.fs /mnt/data<br />
5.6 mkdir -p /mnt/data/boot/grub<br />
5.7 cp boot/grub/* /mnt/data/boot/grub<br />
6. setup grub on hda<br />
6.1 grub<br />
grub> root hd(0,0)<br />
...<br />
grub> setup hd(0)<br />
...<br />
Done.<br />
grub> quit
</div>
<br />
<div class="indent">
Thats it!
</div>
<br />
<div class="indent">
If one created a different partition for hd install, menu.lst and some statements above MUST be changed<br />
accordingly:<br />
primary ide channel<br />
1st ide hd; 1st primary part. hda1 hd0,0<br />
1st ide hd; 2nd primary part. hda2 hd0,1<br />
1st ide hd; 3rd primary part. hda3 hd0,2<br />
1st ide hd; 4th primary part. hda4 hd0,3<br />
<br />
2nd ide hd; 1st primary part. hdb1 hd1,0<br />
2nd ide hd; 2nd primary part. hdb2 hd1,1<br />
...
</div>
<br />
<div class="indent">
Peter.Sieg@gmx.de<br />
<div class="indent">
<br />
</div>
<a class="ext" href="http://www.goosee.com/puppy/sforum/simpleforum_files/attachments/Grub.zip">http://www.goosee.com/puppy/sforum/simpleforum_files/attachments/Grub.zip</a><span class="exttail">∞</span>
</div>
<br />
<br />
<hr />
<br />
<b>Simple Grub Win/Puppy Boot CD: <br />
<div class="indent">
This is a simple <a href="http://puppylinux.org/wikka/HowTo">HowTo</a> on creating a Grub boot CD to boot Puppy if you have it installed in a Win fat32 partition.<br />
Just download the file to my-applications, open rxvt, cd to my-applications and type in :<br />
<br />
<br />
tar zxvf simplegrub_cdboot.tar.gz<br />
<br />
This will open the file and you can take it from there.<br />
<br />
If you don't understand or find the instructions confusing please post a reply.<br />
<br />
<a class="ext" href="http://www.goosee.com/puppy/sforum/simpleforum_files/attachments/simplegrub_cdboot.tar.gz">http://www.goosee.com/puppy/sforum/simpleforum_files/attachments/simplegrub_cdboot.tar.gz</a><span class="exttail">∞</span>
</div>